
One Net Address Book lists phone numbers in your company as well as the people and company features assigned to each number. You can use One Net Address Book:
- In One Net Feature Management Portal
- In One Net Operator Console
- In One Net Mobile Client
- On your desk phone
To view One Net Address Book:
-
Access One Net Feature Management Portal.
- Select Apps > Address Book.
To add a contact to One Net Address Book
-
Access One Net Feature Management Portal.
- Select Apps > Address Book.
- Select .
- In the Creation type section, select a single contact.
- Enter the required contact information.
You must enter at least a first name, a last name and one phone number.
- In the Privacy section, select Yes to add a private contact.
Or
In the Privacy section, select No to add a contact for the company.
- In the Summary section, select at the bottom of the page.
Importing contacts from a CSV file
You can import several contacts at once from a CSV (comma-separated values) file. You can create the file in a text editor or in Microsoft® Excel®.
You can download a template of a CSV file from One Net Feature Management Portal and use it to create a CSV file with your contacts.
Creating a CSV file with contacts
The first line in the file must contain the column headings. Each line under the heading must contain the information for one contact.
The contact information in the CSV file must meet the following criteria:
- The following columns contain a value: 'User name', 'Title', 'First name', 'Last name', 'Numbers list', 'Privacy'.
- Phone numbers have a country prefix.
- The following format for mobile phone numbers:
<mobile phone number>#<short number>#MB. - The following format for fixed line phone numbers:
<fixed line phone number>#<short number>#FX. - The following format for contacts with both mobile and fixed line phone numbers:
<mobile phone number>#<short number>#MB |<fixed line phone number>#<short number>#FX. - Columns are separated with the , (comma) character.
- 'FALSE' in the 'Privacy' column for contacts seen by everyone in the company.
- 'TRUE' in the 'Privacy' column for contacts seen only by you.
Show me an example
An example below shows contents of a CSV file with three contacts. The following columns contain information:
- 'User name'
- 'Title'
- 'First name'
- 'Last name'
- 'Numbers list'
- 'Privacy'
User Id, User name, Email, Organization group, Assistant name, Assistant extension, Managers list, Title, First name, Last name, Organization, Numbers list, Fax number, Privacy, Address, Custom Field1, Custom Field2, Custom Field3, Custom Field4, Custom Field5, Custom Field6, Custom Field7, Custom Field8, Custom Field9, Custom Field10, Custom Field11, Custom Field12, Custom Field13, Custom Field14, Custom Field15, Custom Field16
,jane_b_doe,,,,,,Mrs,Jane B,Doe,,443015551231#1231#MB,,FALSE,,,,,,,,,,,,,,,,,
,john_m_doe,,,,,,Mr,John M,Doe,,443015551232#1232#FX,,TRUE,,,,,,,,,,,,,,,,,
,jane_c_doe,,,,,,Ms,Jane C,Doe,,443015551233#1233#MB | 443015551234#1234#FX,,FALSE,,,,,,,,,,,,,,,,,
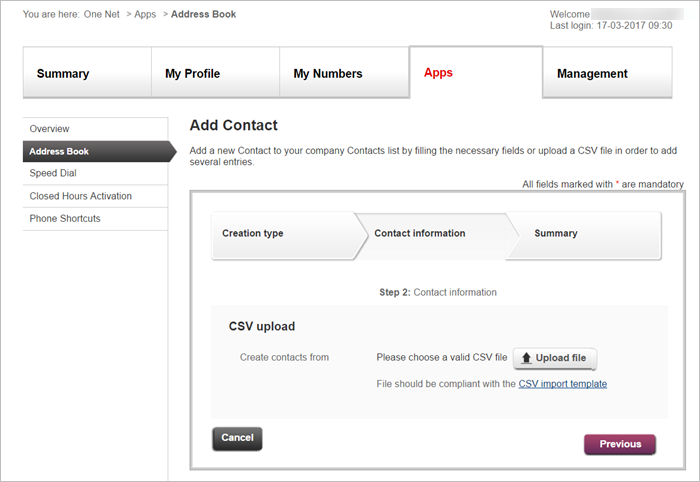
To import contacts from a CSV file
-
Access One Net Feature Management Portal.
- Select Apps > Address Book.
- Select .
- In the Creation type section, select multiple contacts from a CSV file.
- Select .
Comments
0 comments
Please sign in to leave a comment.